Russian cake with condensed milk
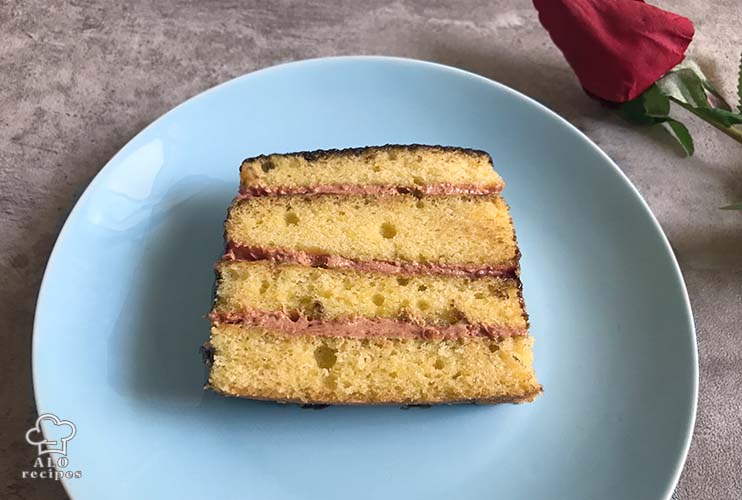
The Russian cake with condensed milk is a delicious layered cake with a distinct appearance from other cakes. In truth, it’s a pretty good and a little bit bizarre cake.
In the recipe for this cake, a beautiful buttercream is used to bond the layers together, made from a mixture of condensed milk and butter.
It is important to note that the condensed milk used in this recipe for the filling must be pre-boiled to get a caramel color.
It should note that this Russian cake with condensed milk is a trendy one with an appealing look that dazzles everyone at celebrations and cafes.
It’s important to know that this Russian cake with condensed milk and the Russian honey cake (Medovik) are not interchangeable; they are very distinct.
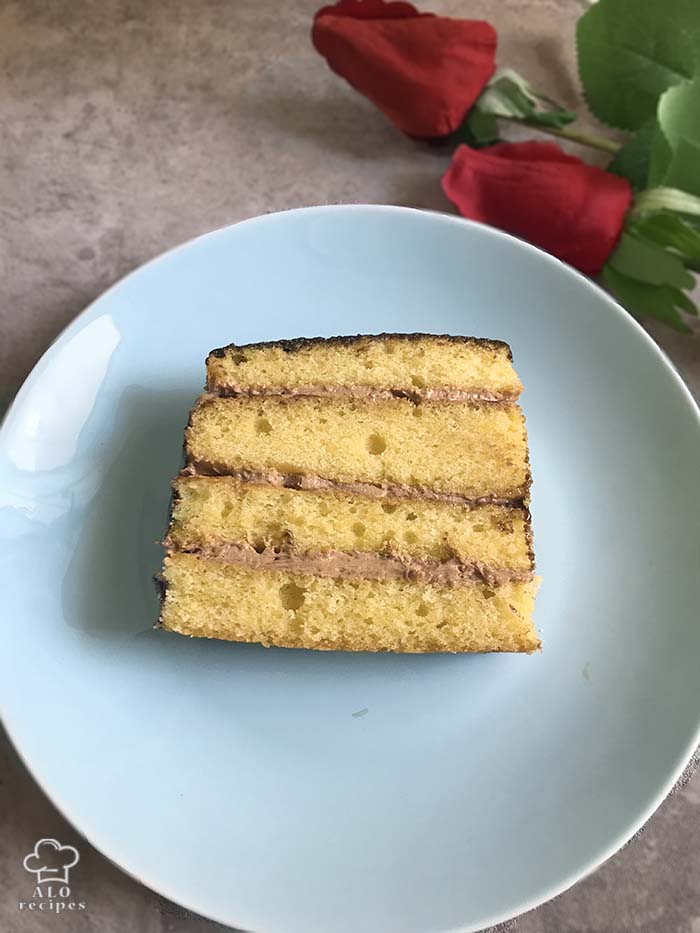
In addition, it should be mentioned that this cake has only four layers and is thus far less complicated in its preparation.
The recipe for Russian cake with condensed milk calls for layers of sponge and soft cake that have a nice texture and melt in the mouth when cut into slices.
We attempted to take a deep look at what kind of cake this is to expose you to some of the flavors at the beginning of the essay.
How to prepare the Russian cake with condensed milk?
Follow along as we demonstrate how to make this cake step by step:
Russian cake with condensed milk
Servings: 6 people
Ingredients
- 250 g Butter room temperature
- 2 ⅓ cup Flour
- 100 g Cream
- 4 Eggs
- 1 ½ Sugar
- 1 ½ tsp Baking powder
- some Vanilla
Ingredients required for the preparation of the filling
- 1 can Condensed milk caramelized
- 200 g Butter
- 1 tbsp Cocoa powder
Ganache for the top of the cake
- 100 g Cream
- 100 g Chocolate
Instructions
- Heat the oven for 15 minutes at 180 degrees Celsius before starting any work at the beginning of this procedure.
- Grease the 25 by 35 cm rectangle pan and cover it with greaseproof paper at this point.
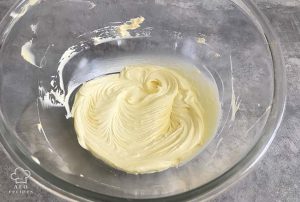
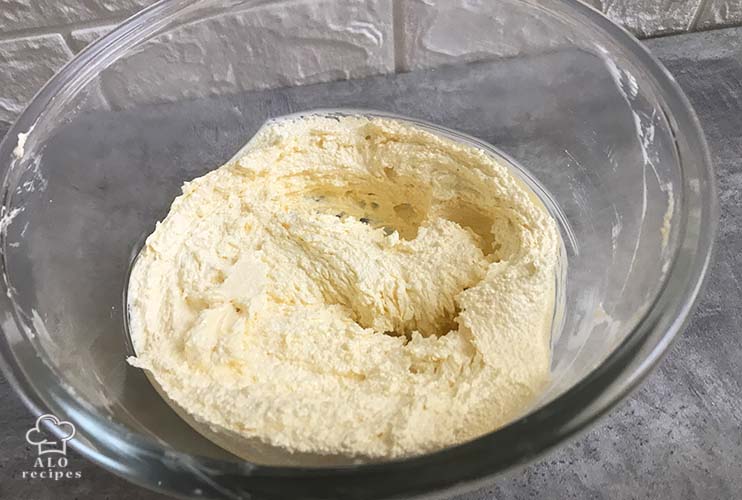
- In the following step, use a mixer to lightly whip the butter, which is put at room temperature, to get the butter out of its initial form.
- Then slowly add the sugar to it. For a smooth and soft mixture, blend the butter and sugar for 3 to 4 minutes on medium speed.

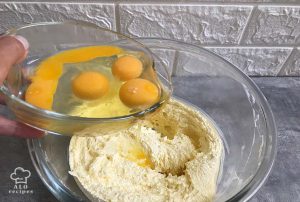
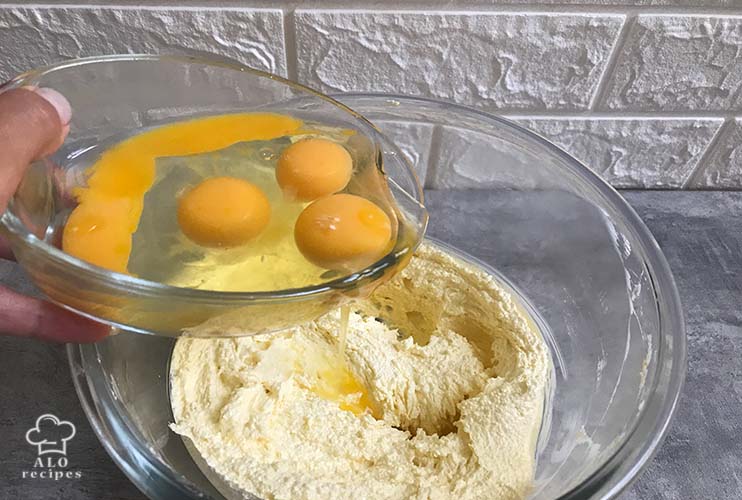
- At this point, start adding the eggs one at a time. Each one should be beaten for around 30 seconds.
- It is now time to add the vanilla extract and mix it.
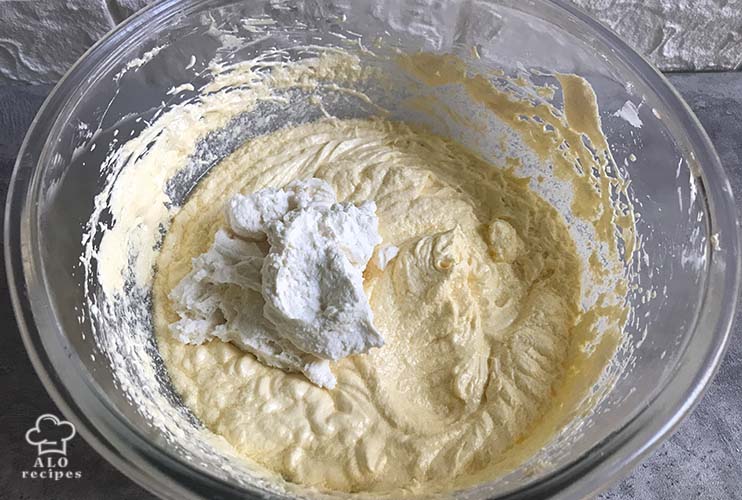
- Next, combine the cream and baking powder in a separate bowl, add to the rest of the ingredients and blend again with a mixer.
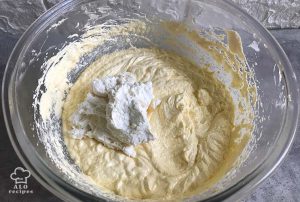
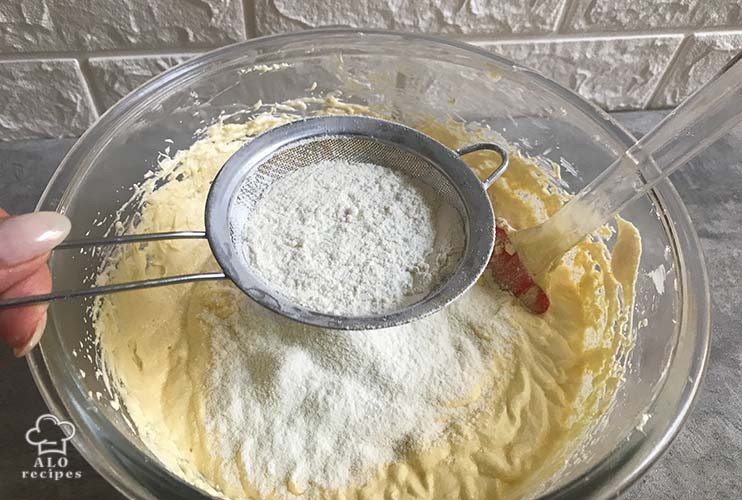
- Add the flour (with the sieve) to the rest of the ingredients and stir well using a whisk or silicone spatula until completely smooth. Don’t overmix.Note: It is important to remember that you should avoid mixing too much need.

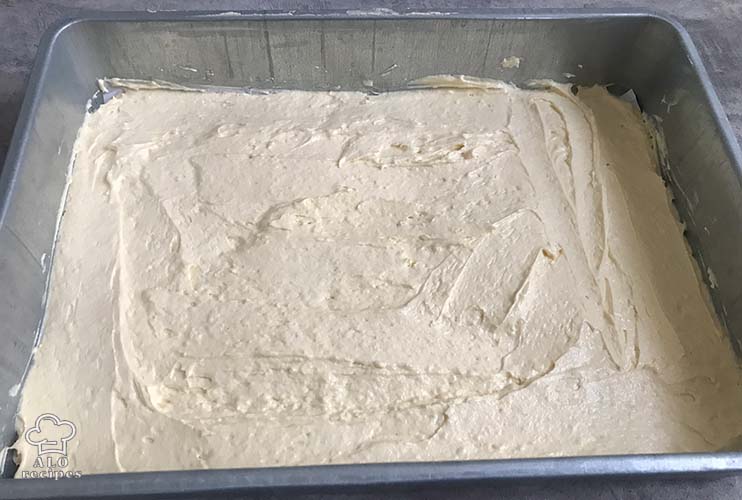
- Now, divide the batter and pour the mixture into different bowls. Pour the first one into the pan and bake it in the oven for 15 minutes or until it is done.Note: Consider using cellophane to protect the second piece of batter.
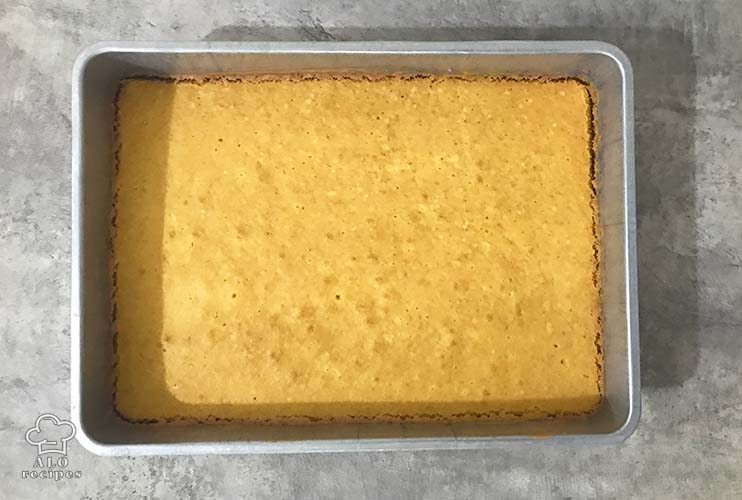
- Bake the batter for 15 to 20 minutes. After 15 minutes, check the cake with a toothpick.
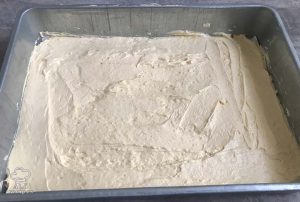
- Now, pour the batter for the second series into the pan and bake in the oven for 15 to 20 minutes.


Notes
To properly create this cake, it is necessary to consider the following factors:
- First and foremost, since this cake is in the shape of a thin layer, the edges should become a light golden hue while being cautious not to get very brown.
- Second, you must remember that if you bake the cake for more than 15 to 20 minutes or if the oven temperature is too high, the cake will dry up and crumble to the bottom.
- Third, be cautious about placing the cake on the middle or higher rack to avoid burning.
- Fourth, after baking, allow the cake to cool fully before cutting it into pieces. After that, pull it from the pan and ready it for filling.
- Fifth, when you take the first cake out of the oven, wash the mold well before pouring the second batter into it and baking it in the same range as the first cake. Nothing will happen to the second batch of supplies, so don't worry.
Best way to caramelize condensed milk
To prepare a Russian cake with condensed milk, a can of condensed milk must be boiled in water to become caramelized.
This may be accomplished in one of two ways:
- Put it for about one and a half hours in the pressure cooker.
- Put about 6 to 7 hours in a container holding water on gas.
It is critical to remember that the can must be entirely immersed in water during the processes, and water covering the whole surface of the can.
After boiling, it takes on the following color: (photo)
The buttercream filling: a combination of Condensed milk and butter
It is time to prepare the filling for the Russian cake with condensed milk in this segment, so please join us to learn the process step by step.
Preparation of the filling:
Filling
Ingredients
- 1 can Condensed milk caramelized
- 200 g Butter at room temperature
- 1 tbsp Cocoa powder
Instructions
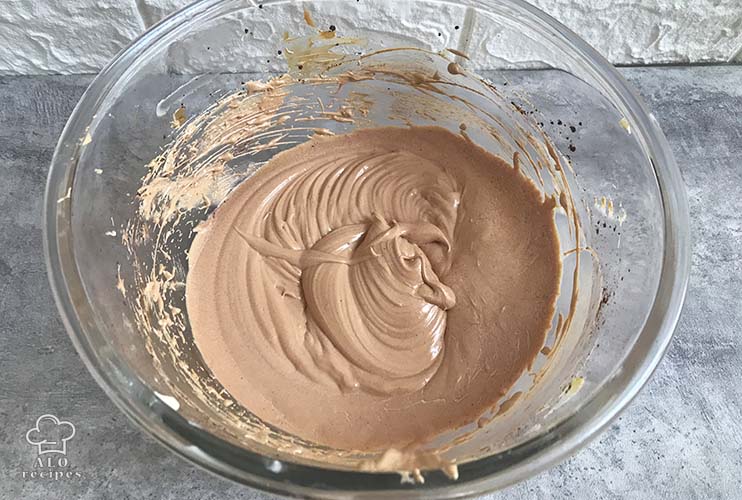
- First, make sure that the butter is at room temperature before continuing with the recipe. To make it lighter in color and fluffy, whip it with an electric mixer after it has reached room temperature. This will take around 3 to 4 minutes of your time to complete.
- In this step, add the caramelized condensed milk in several stages, gradually increasing the amount each time. Combine the ingredients well to get a smooth and texture-friendly consistency.
- It's time to add the cocoa powder.Important tip: Once the liquid is ready, place it into a container with a tight-fitting lid. Allow for 2 hours of resting time in the refrigerator, and then remix it when you take it from the fridge.It is presently complete and ready for filling!Note: keep in mind that this filling should be put on the cake when it is still cold; unfortunately, it will become loose and difficult to deal with if it warms up because butter softens when exposed to air at average room temperature.

Preparing the ganache in 3 steps:
- In the first step, heat the cream over low heat until it begins to boil and warm up around the edges.
- Crush the chocolates and add them to the mixture in the second stage. Stir until the chocolate is fully dissolved and the mixture is smooth.
- The final step is to pour the liquid on top of the cake while it is still hot.
Helpful note: If the mixture is allowed to cool entirely, it will become stiff and not be readily rubbed on the cake.
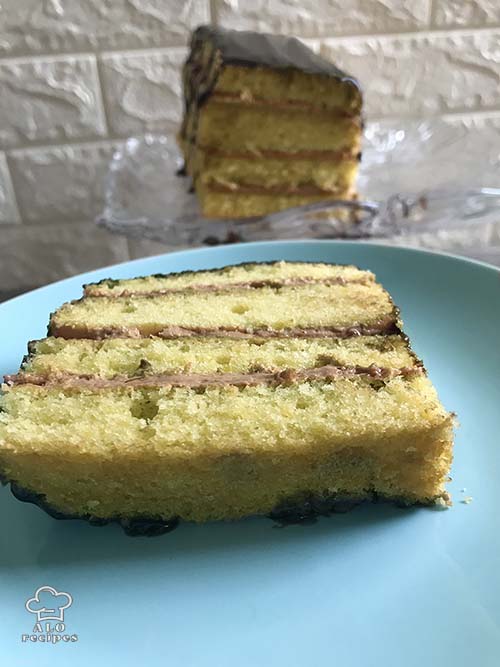
Cutting and filling in 4 steps:
- Let the cake cool fully before proceeding with the rest of the process.
- Then, gently peel away the greaseproof paper from the cake in the second step.
- divide each cake into two equal pieces in the third stage.
- In the fourth stage, we have four layers of cake, which we rub filling material on each of them and stack on top of each other, pressing each layer a bit to ensure that it adheres to the one below.
And it’s finished!
Pouring ganache on the Russian cake with condensed milk in 2 steps:
Now you entirely be familiar with how to rub the filling on the cake after completing the cooking process in the previous stage. After the filling of the cake’s layer has been well done, it is time to pour the ganache over the top.
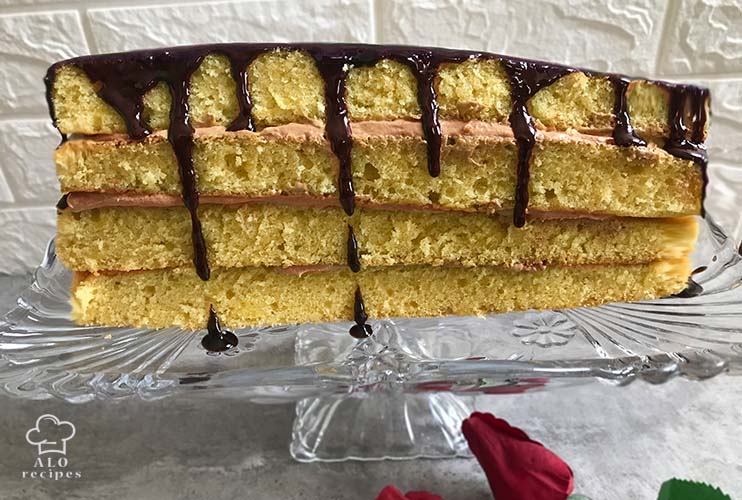
How to pour ganache over a Russian layer cake:
- To begin, use a spoon to pour the ganache over the sides of the cake, allowing it to drip.
- Consider that to pour more ganache in the areas where you want it to drip more. Then, using a spoon, smooth out the ganache in the center of the cake.
Some important points to remember about the Russian cake with condensed milk: - Although the flavor of ganache is fantastic when combined with a filling material; yet, you can remove using ganache from this recipe.
- The cream can be used instead of condensed milk filling or pipe the cream on the cake.
- Refrigerate the cake for at least 1 hour after it has been finished to ensure that the filling on top of the cake has been absorbed as nicely as possible.
At last,
A simple and adorable layered cake appropriate for serving friends and guests, called Russian cake with condensed milk, is a great choice.
It has a soft and excellent texture, and the flavor of condensed milk makes it an ideal option for filling because of its sweetness.
The flavor of this cake is entirely derived from its filling, while the cake itself is simple. A delicious Russian cake with condensed milk, such as Nescafe cake, is made even better by adding its contents.